Tutorial – building a language server for your DSL
 Christian Schneider
Hey there, this is Christian. VS Code’s Language Server Protocol opens up a new horizon of programming IDE development. And there’s good news: Eclipse Xtext 2.11 will support you in building up a language server for your DSLs. With this post I want to demo that by means a pre-release snapshot starting with a blank desk. I’m going to tell you about
- setting up an Eclipse-based development IDE
- creating and configuring the required Xtext projects
- testing the language server supporting your DSL
The Eclipse-based development IDE
So lets get started with the development IDE. You can use either the Eclipse Installer or, like me, choose a pre-build IDE. I suggest the OxygenM4 build of the “Eclipse IDE for Java Developers” package. Once downloaded, extracted, and running install the Xtext Complete SDK from https://download.eclipse.org/modeling/tmf/xtext/updates/nightly/. If you don’t use an Oxygen package, make sure to have the latest milestone of Buildship installed, you’ll get it from https://download.eclipse.org/buildship/updates/e46/milestones/2.x/.
Creating the Xtext projects
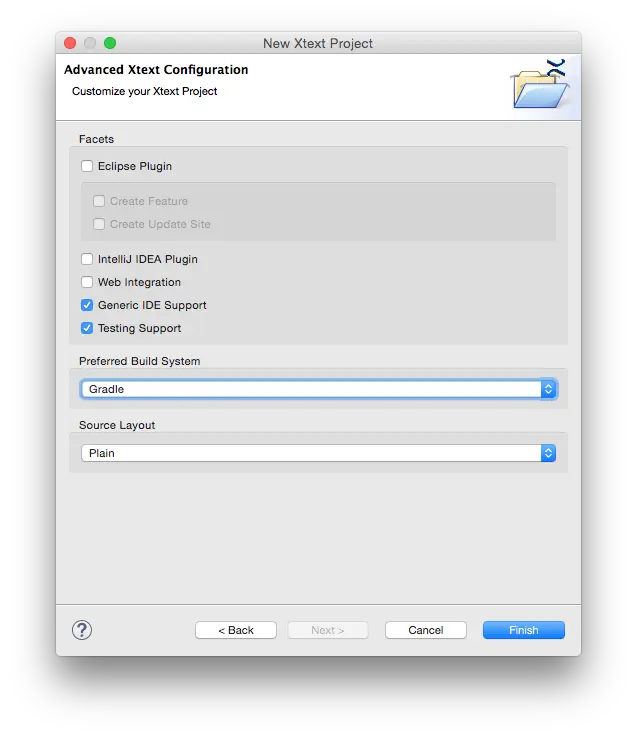
With Xtext installed create a new Xtext Project via File → New → Project…. On the Advanced Xtext Configuration page you have to switch to the Gradle build system. Besides you may want to deactivate the Eclipse Plugin.
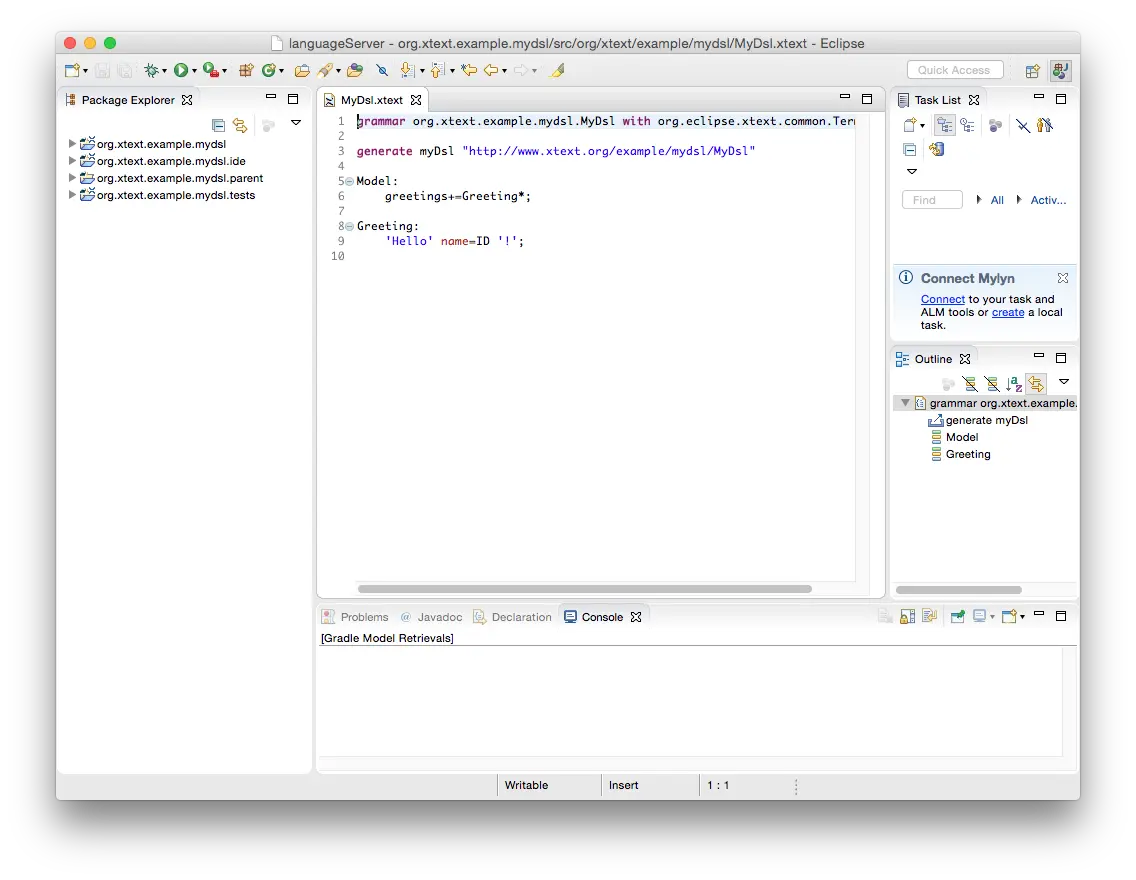
After finishing the wizard you find your workspace like this:
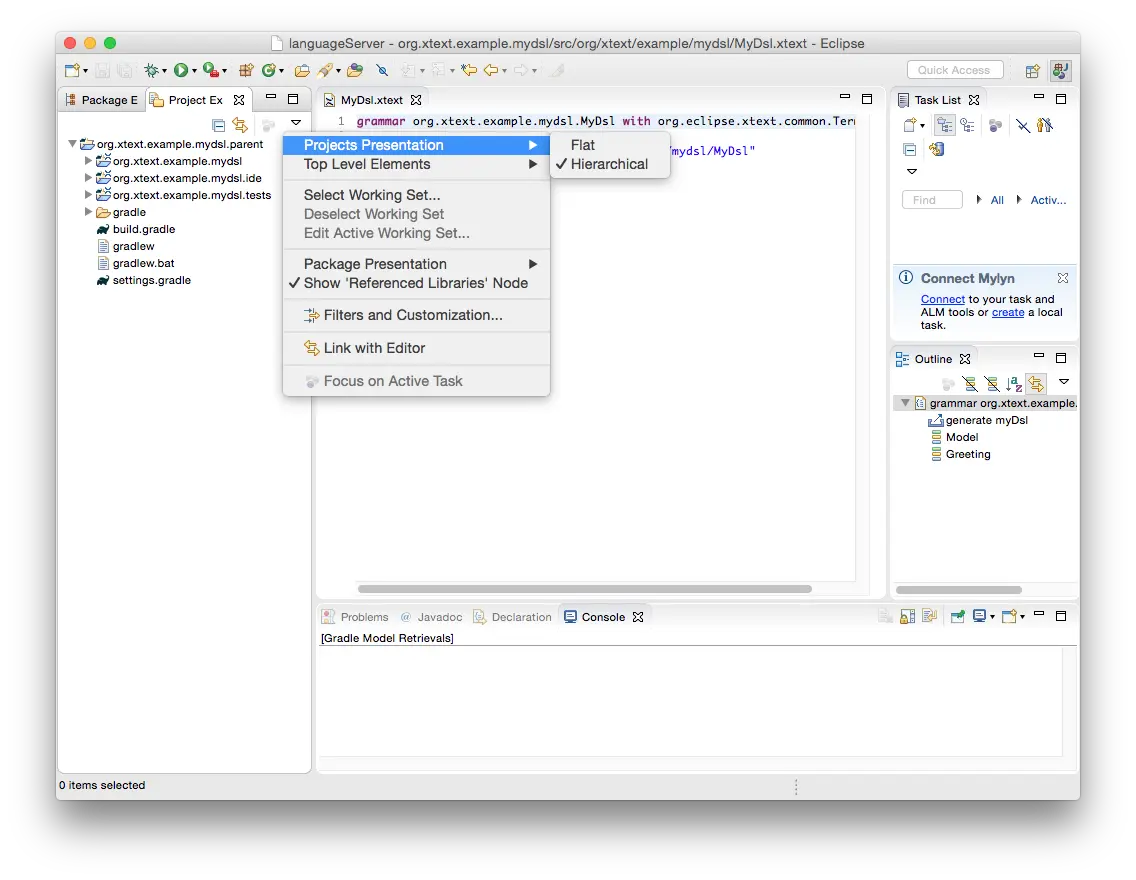
For simpler orientation in the workspace I suggest to switch to the Project Explorer that is able to present the projects in a hierarchical fashion.
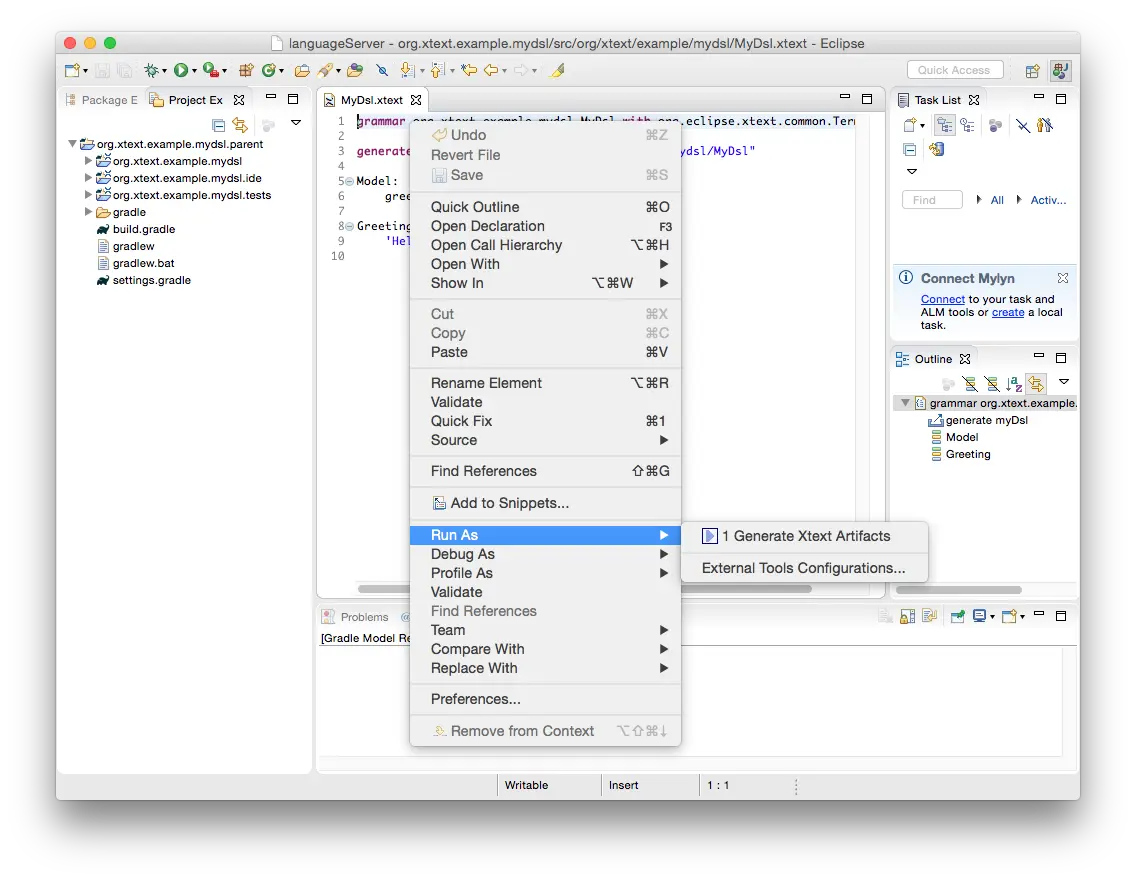
Now invoke the Xtext code generator as usual, e.g. via the context menu.
Adding a dedicated language server test project
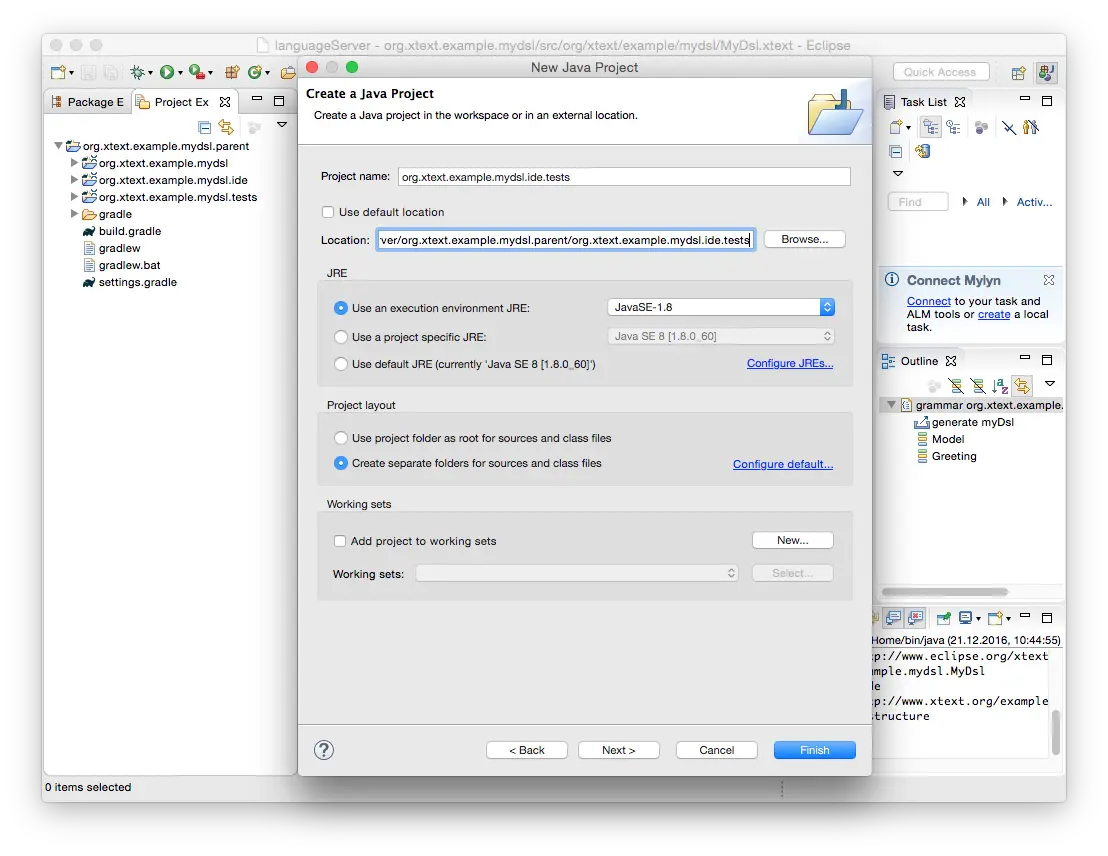
For this example I suggest to put our language server test into an additional project named org.xtext.example.mydsl.ide.tests , so let’s create that project.
Create a new Java Project and set the project location manually to <yourWorkspaceDir>/org.xtext.example.mydsl.parent/org.xtext.example.mydsl.ide.tests , like this:
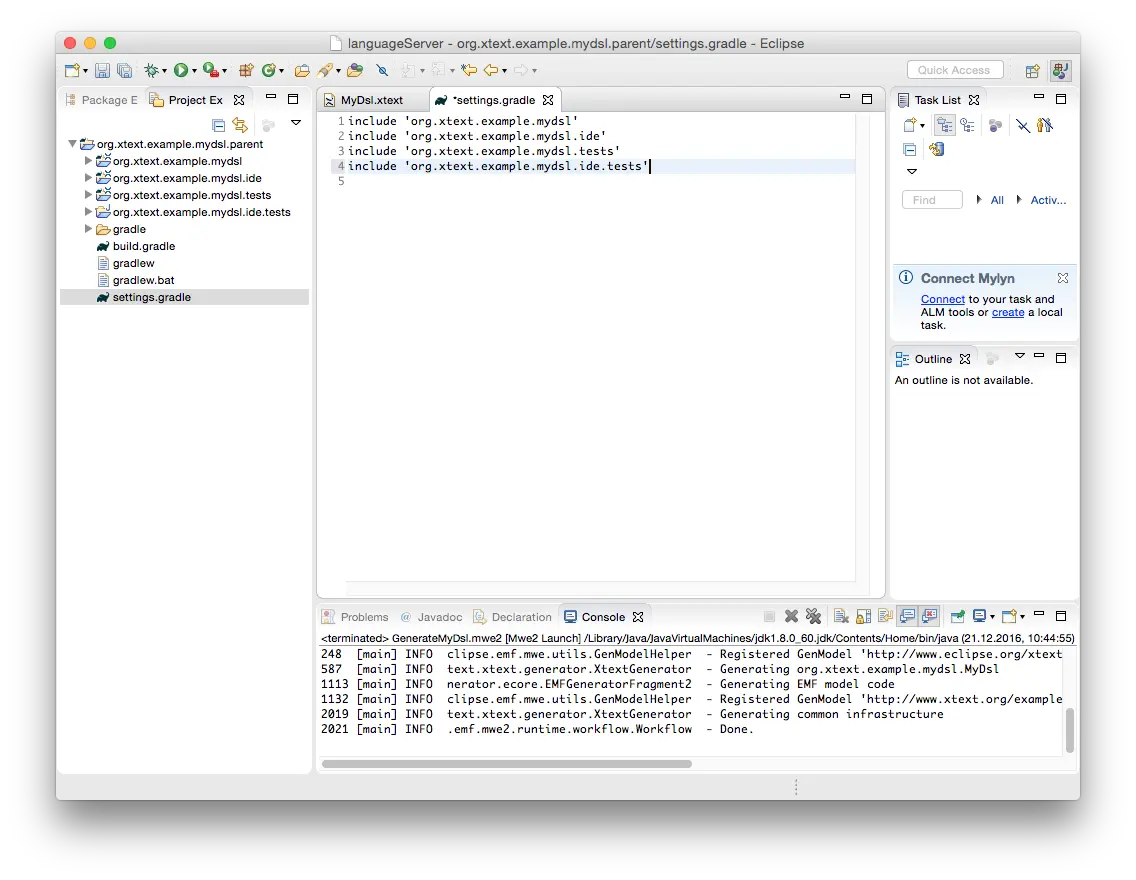
Include the new project into the Gradle build configuration by adding it to the settings.gradle of the parent project, see line no 4 below:
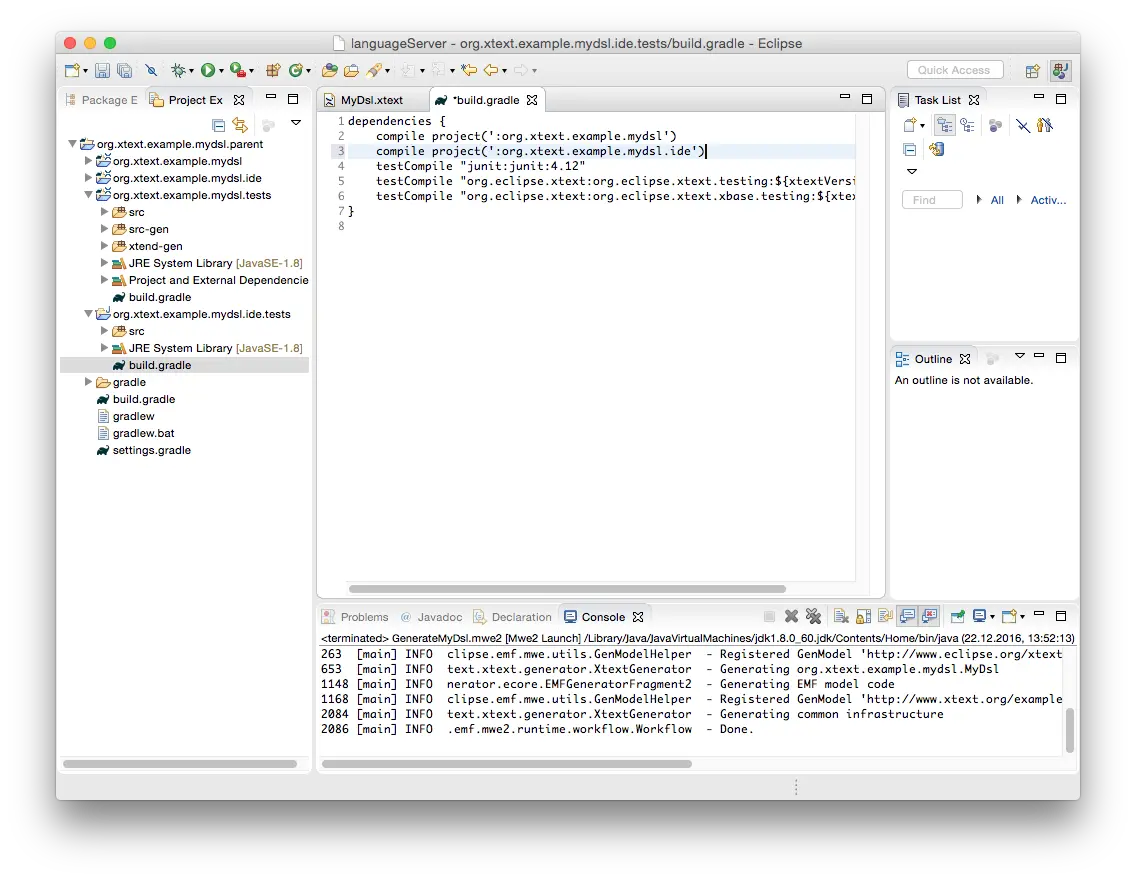
Copy build.gradle from org.xtext.example.mydsl.tests to org.xtext.example.mydsl.ide.tests and add a dependency to org.xtext.example.mydsl.ide, see line no 3 in the following screen shot.
Having everything saved we need to poke Buildship, which connects Gradle and Eclipse, to re-evaluate the build settings. This is done via the context menu of a project – I just chose the parent project – → Gradle → Refresh Gradle Project.

The language server test
Create an Xtend class named org.xtext.example.mydsl.ide.tests.LanguageServerTest in the src folder of your new project with the super class org.eclipse.xtext.testing.AbstractLanguageServerTest.
Add the following constructor and test method.
new() {
	super("mydsl")
}

@Test
def void test01_initialization() {
	val capabilities = initialize().capabilities
	Assert.assertTrue(
    	capabilities.definitionProvider && capabilities.documentFormattingProvider)
}
This first test initializes your language server.
The language server answers the initialize() call with infos on the supported features.
The test assumes the language server to be able of resolving definitions of cross-references and formatting documents according to DSL-specific formatting rules. The contributions of AbstractLanguageServerTest instantiate the language server and initialize the test. The test itself simulates a language client and collects responses from the server.
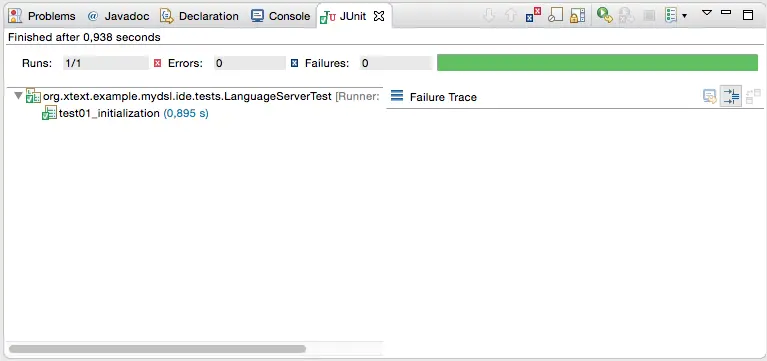
Last but not least AbstractLanguageServerTest contributes lots of convenience methods corresponding to the services of language server. Now run your test class as JUnit Test, e.g. via the context menu (right-click on the class name!), …

… and checkout the result:
Let’s add further tests.
The following one creates a file named hello.mydsl on the disc and instructs the language server to load it.
The content is Hello Xtext! The test expects the language server to successfully load the document without any issues, which is indicated by an empty list of diagnostics provided by the server.
@Test
def void test02_openFile() {
	initialize()

	val file = 'hello.mydsl'.writeFile("")
	file.open('''
		Hello Xtext!
	''')

	Assert.assertTrue("There're issues in file 'hello.mydsl'.", diagnostics.get(file).empty)
}
Last but not least let’s test the code completion ability of your language server.
The following test assumes a document with the content He, the cursor is located at the end of the line that is in column 2.
The test expects the language server to offer a (single) completion proposal labeled Hello replacing the prefix He starting at line 0, column 0 and ending at line 0, column 2 with Hello.
@Test
def void test03_completion() {
	testCompletion [
	    model = 'He'
	    line = 0
	    column = 2
		expectedCompletionItems = '''
			Hello -> Hello [[0, 0] .. [0, 2]]
		'''
	]
}
Conclusion
Congrats! You build your own language server! For further reading on customizing your Xtext-based language server wrt. the grammar of your DSL, scoping & linking, formatting, and code completion refer to https://eclipse.dev/Xtext/documentation/. Your DSL contains expressions? Have a look on this post. Finally, you wanna use your language within Visual Studio Code? Miro explains here how to achieve that.
About the Author
Christian Schneider
Christian is a seasoned DSL enthusiast with a decade of expertise in language tooling and graphical visualizations. While striving for innovative and sustainable solutions, he still pays attention to details. Quite often you’ll find Christian nearby the sea, with the seagulls providing a pleasant ambience to his meetings.